

I also tried 3D nail decal stickers from Sally's. I hated the texture of these and removed them right after snapping a few pics!

Last night I got around to trying a manicure I had been wanting to attempt for a long time - a full on (double!) rainbow gradient. I was intimidated to try this. I had only ever done a maximum of 3 colours in a gradient, and I was looking at using 6 to get the effect that I wanted. My nails are at a good length now, so last night I finally decided to go for it. Here are the polishes that I used:
 |
| Zoya Marley, OPI Pink Friday, random orange OPI (oops! no label!) mixed with white*, Essie Barbuda Banana, Picture Polish Honey Dew, and Essie Borrowed & Blue *I really need to get a pale orange! |

I apologize that my thumbnail looks a little gnarly... I am mending a crack with a tea-bag patch - I'm pretty new at this but it's holding up well! Here are a few more pics. I'm really happy with how this manicure turned out!


I want to share one tip with you... this is the best thing that I have come across to help me with sponging. When I sponge a gradient on my nails, I like to cut up a makeup sponge into tiny pieces in order to get the most of it. The pieces are difficult to hold, especially with freshly-painted nails. I tried regular tweezers, but these proved difficult too, since you have to continually squeeze so you don't drop the sponge. Enter these tweezers:
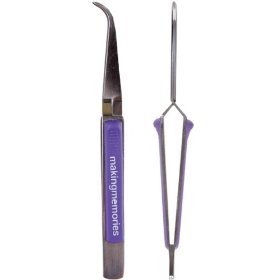
I believe that they are sticker tweezers, from a company called Making Memories. I bought them at Michaels Craft store years ago. They are reverse tweezers, so by default they are in a closed position, and you only have to squeeze to release the grip and open the tips. This is great for sponging, since you can loosely hold the tweezers like a pencil and not strain your wrist or risk ruining your mani :)
Thanks for reading,
Hayley


